Cari Blog Ini

Entri Populer

Tampilkan postingan dengan label fur. Tampilkan semua postingan

Jumat, 15 Januari 2010

Ammy AGAIN (Day 111)


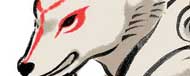
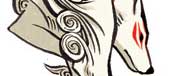
I know, I'm posting a day late. Well, since it's after midnight, it's two days late. In any case, "today" I finished up Amaterasu's wing / fur tufts. They're don't look how I originally planned them, but I like them better the way they turned out than I did when I planned them. Funny how things turn out, isn't it? =D

Mom was none too happy about the mess I left on the kitchen table though. Fur EVERYWHERE! I only did it out there to spend time with her.. *sniffle*

I still have a few things to buy and make before I consider Amaterasu to be 100% done, but as of now, I consider her to be ready for competition at AOD.
READ MORE - Ammy AGAIN (Day 111)

Minggu, 20 Desember 2009

Ammy's Wings & Chi's Ears (Day Eighty-Six)


I always forget how time-consuming Ammy was. I like to think it's similar to the fact that women have hormones that make them forget how horrible their pregnancy was after they had the baby. After I stop working on Ammy and wear her to a convention, I completely forget exactly how much time, money, and effort she took.

I spent three or so hours on Amaterasu's shoulder wings today, and I only covered one wing with fur, plus a couple of minor things. Although I do want to say again how thankful I am for this blog, both to my starting it and to my readers. If it weren't for my strange yet extremely strong desire to post something, I probably wouldn't work on my costumes until a week or so before their debut. Then today's setback with Ammy's wings would've been a big deal. It turns out that the wings are too heavy and need more than just the one arm band I have to hold them up. So I figured out how to fashion new arm bands that will be attached to the wings in addition to the ones I already have. The new bands won't be as visible though, so the overall look will stay the same.


In addition to all of that, I finally got fed up with waiting to buy a headband to put Chi's ears on, so I improvised. I used elastic, the same kind I used on the back of my mask, and made essentially a headband. I'm not thrilled with it, but it works very well and actually gives the ears a better shape, I think. I may tweak them a bit more, but if for some reason I run out of time or something, they're definitely usable. I also attempted to give them a metallic shine by painting them with an opaque silver paint. However, that may have only made them look dirty. I'll see when they look like tomorrow and go from there. If all else fails, I'll just paint over them with white paint and seal them. The sealant should give enough of a shine.
READ MORE - Ammy's Wings & Chi's Ears (Day Eighty-Six)

Senin, 07 Desember 2009

Patching Ammy's Wounds (Day Seventy-Three)


As promised, I patched up Amaterasu today. She needed it more than I thought =/ Poor thing. While she was, in my book, an above average costume (okay, she was damn great), I still saw many flaws. I'm sure others noticed a few too.

I lined the inside of her leg pieces (led-warmer-lookin' things xD) because they were previously completely unlined and I had the foam parts against my tights and it stuck to them and made them not only to put on and take off, but difficult to move around in. I'm toying with the idea of completely lining the inside so that the elastic won't touch my tights either, but it's not an issue yet, so we'll see.

I added fur where it was needed on the shorts, there were some patches of jeans showing through, and some seams, basically. I covered them pretty well, now all I have to do is remember to brush my butt and crotch after putting the shorts on to be sure I'm covered. HA! xD

The bottoms of the feet were coming off, and the foam on one started to detach itself from the shoe, so I fixed all of that. I also added another layer of Shoe Goo to the bottoms of the black paw pads. I'm still trying to figure out Shoe Goo's properties though, so I may have to redo that again. I know for sure I have to paint the white bits or something, because the Shoe Goo I have for that part is clear, and the white is so dirty, I can't clean it off.

I also re-made the straps to the shield, as the ones I had BOTH fell off at Holiday Anime Faire. I actually had to remake them twice, but I think it was worth it. I used a fabric more suited to the job this time (it stretches =]), and I made them longer, so it's easier to put on and take off. Now if only I could get it to hover a few inches behind my back... Hahaha.

I also got my Heat 'n' Bond and my black lace today. =D As well as more white fur. Just in case I don't have enough.

Tomorrow, I really have to finish up my final project for Costume Construction, so Ammy will probably be left in her box for the day. We'll see how quickly I get done. My next task, before adding onto Ammy, is to finish, or at least make wearable, my Chi dress. While I won't be cosplaying Chi until Fanime, May 30th, I plan on wearing the dress To SacAnime Winter on January 9th. Which is the entire reason I needed Heat 'n' Bond so badly.
READ MORE - Patching Ammy's Wounds (Day Seventy-Three)

Senin, 30 November 2009

Working with Fake Fur

Before I start anything, I'd like to clearly state that most of what I learned about working with fake fur, I learned from matrices.net. Things that I learned from there that I post here will be linked back to that site, though not necessarily to where it was said, so you'll just have to trust me that it's in there. So let's start.

~ When working with fur, fake or not, do not cut it with scissors. Ever. This will cut the actual fur and you'll end up with fur shorter or even missing in some places. Use a razor knife and cut from the back. * Meaning turn the fur over so that the fuzzy side is facing the cutting surface, and cut using the razor knife on the underside. Do this with even extremely short furs, I know from experience (Ammy mask) that that makes a difference.

• On the back of the fur, before cutting it, draw arrows indicating which direction the fur lays in. * Check and double-check this before cutting, I've messed this up a couple of times. About ninety percent of the time, you can get away without doing this, but that last ten percent of the time will come all at once when you're almost done and running low on fur. Again, just trust me. It's better to mark it than not.

• When working with white fur, use a light-colored marker for any markings on the back. This depends on how thick the fur is, but it's generally a good rule. I ended up using a lime green Sharpie after the red one bled through on my Ammy mask.

• Light colored fur will take Sharpie ink. Meaning if you have a light-colored fur, and you want to make it a dark-colored fur using a permanent marker, you can. However, it takes a fair amount of marker to get total coverage. If you want to dye a large area, you'd be better off buying the color fur you want right off the bat, unless you can't find it.

* The asterisk indicates stuff I learned from matrices.net.
READ MORE - Working with Fake Fur

Ammy's Mask & Arm Bands (Day Sixty-Six)

I finished Ammy's mask with surprising speed today, or at least it felt like surprising speed. It was really more like several hours. I covered the mask with the fake fur / felt, which is really more like fur than I thought it was, and should have been treated as such. I really, painfully regret how wide and long I made the muzzle. I may make another mask some time down the road, but I still have moldy paper mache in my room. I'll throw it out tomorrow when my mom's not home to yell at me about it. considering the entire mask cost me less that five dollars, it wouldn't be too much of a loss to make a second one. However, the three or so hours I spent making it... That's another story. Which is why I won't be re-doing it any time soon.

I crafted the actual nose out of Sculpt It Clay. I don't really recommend the stuff, but it's not as bad as it could be. I then sealed it with I forget what brand of sealer, painted it (because the clay I used was purple O_o), and sealed it again. I really like the effect of the clay's imperfections as well as the sealed paint. It makes it look like the nose it wet, like a dog's should be, haha.

I started on the arm bands for Ammy's tufts of fur, or "wings," but they're kind of a paint in the butt. The bands are fur with cotton lining and quarter-inch elastic inside. I wish I had maybe half-inch elastic, but whatever, I work with what I've got. They're held together with hot glue, which isn't the best either, but it gets the job done and I hate hand-sewing on fur, and I'm not sure how my machine would handle that. My guess is not well. The actual fur tufts are a foam base with fur over them, but I haven't gotten to the fur part, I actually haven't even gotten both bases carved out yet. And I'm not entirely sure how I'll be attaching the tufts to the bands, so that should be fun.

Also, from this point on, I may be posting more than once a day. I will still post at least once to report in on any cosplay details of the day, but I may make a other posts with random-ish topics, as I to when there is no, or very little, cosplay news.
READ MORE - Ammy's Mask & Arm Bands (Day Sixty-Six)